Host Your Own Web Analytics!
Thing I told myself I’d never care about:
My blog views.
Thing I spent the last hour doing:
Setting up Matomo so I could track my blog views. 😅
RyanReynoldsButWhy.gif
When I was entering my personal blog articles as “activities” on my Microsoft MVP application in January, it kept asking silly questions like “how many visitors viewed this article?” that I had no idea how to answer. For most of my other reported activities, it was easy to go to YouTube or the Trimarc Hub to check engagement numbers, but my personal blog is on neither YouTube nor the Trimarc Hub. 😭
Okay, I Guess I’ll Do Some Light Tracking…
To be clear, I really wanted to install one of these bad boys:

But in the real world, such trackers never really worked right. The better answer is a modern tracking/analytics solution. The quickest and easiest solution to this problem is Google Analytics. I’ve used it on a few projects in the past, and it does the job. It’s not amazing, but it maintains its market share somehow (*ahem* monopoly *ahem*). To avoid Google, I spent a little time researching open-source alternatives. Matomo kept coming up, so I decided to try it out.
Enter Matomo

Matomo (originally Piwik) is a web analytics platform that you can self-host. It’s small, light, mature, and doesn’t require getting any more entangled in the Google ecosystem. I’m already attached enough to Google; I don’t need to add another tendril. For the self-hosting averse, Matomo provides a cloud-hosted solution too, but anything more than $0/month is financially infeasible for the amount of traffic my blog gets.
While I haven’t used Matomo much yet, in my testing this morning, it’s provided exactly what I want: visibility into how many people are actually interacting with this very blog. It’s been neat to see when people are actually viewing the site and the path they take from page to page.
If you want to learn about your blog’s visitor, follow along with me!
Deploying Matomo on Oracle Cloud
Alright. I’m not even gonna try to play, folks. I didn’t do anything fancy for deploying Matomo; I reused an existing resource, and I followed a popular blog! Hashtag influencing, baby.
The Existing Resource: a VM on Oracle Cloud

I already had an instance of a VM.Standard.E2.1.Micro machine running Ubuntu 24.04 in Oracle Cloud. This instance was originally deployed as a Mattermost server to host Locksmith internal discussion. Since Locksmith discussion has moved to Discord, I shut down the Mattermost server last month. Since then, I’ve felt bad about using energy to maintain the instance with no real purpose.
Side note: If you are doing a project with small containers, check out Oracle Cloud. Their Always Free tier includes instances that are more than powerful enough to do basic container stuff.
The Popular Blog: How To Install Matomo Web Analytics on Ubuntu 20.04

It turns out, Digital Ocean did all the hard work for me. To reveal these ancient truthes, all I had to do was enter the proper incantation into Google. Out popped this article: How To Install Matomo Web Analytics on Ubuntu 20.04
There were some minor differences between this article and real life. Probably because it was written over 3 years ago. Let’s get into it…
Step 1 - Running Matomo and MariaDB with Docker Compose
No notes here. The Digital Ocean recipe is very clear.
Step 2 - Installing and Configuring Nginx
In Step 2, you install and configure nginx. I have two updates:
- In the line that says
sudo ufw allow "Nginx Full", also be sure to dosudo ufw allow OpenSSH. You probably won’t lock yourself if you don’t do this, but it’s better to be safe than sorry, imo. - The article assumes you have
ufwenabled already. I did not. After adding the nginx and OpenSSH rules, enable the firewall by doingsudo ufw enable.
Everything else is spot on.
Step 3 - Installing Certbot and Setting Up SSL Certificates
Other than calling them SSL certificates, I have no complaints with this section either. In fact, I was pleasantly surprised that Certbot can now modify your nginx configuration for you automatically. It’s been 3 years since I deployed a fresh install of Certbot, so this made me happy.
Step 4 - Setting up Matomo
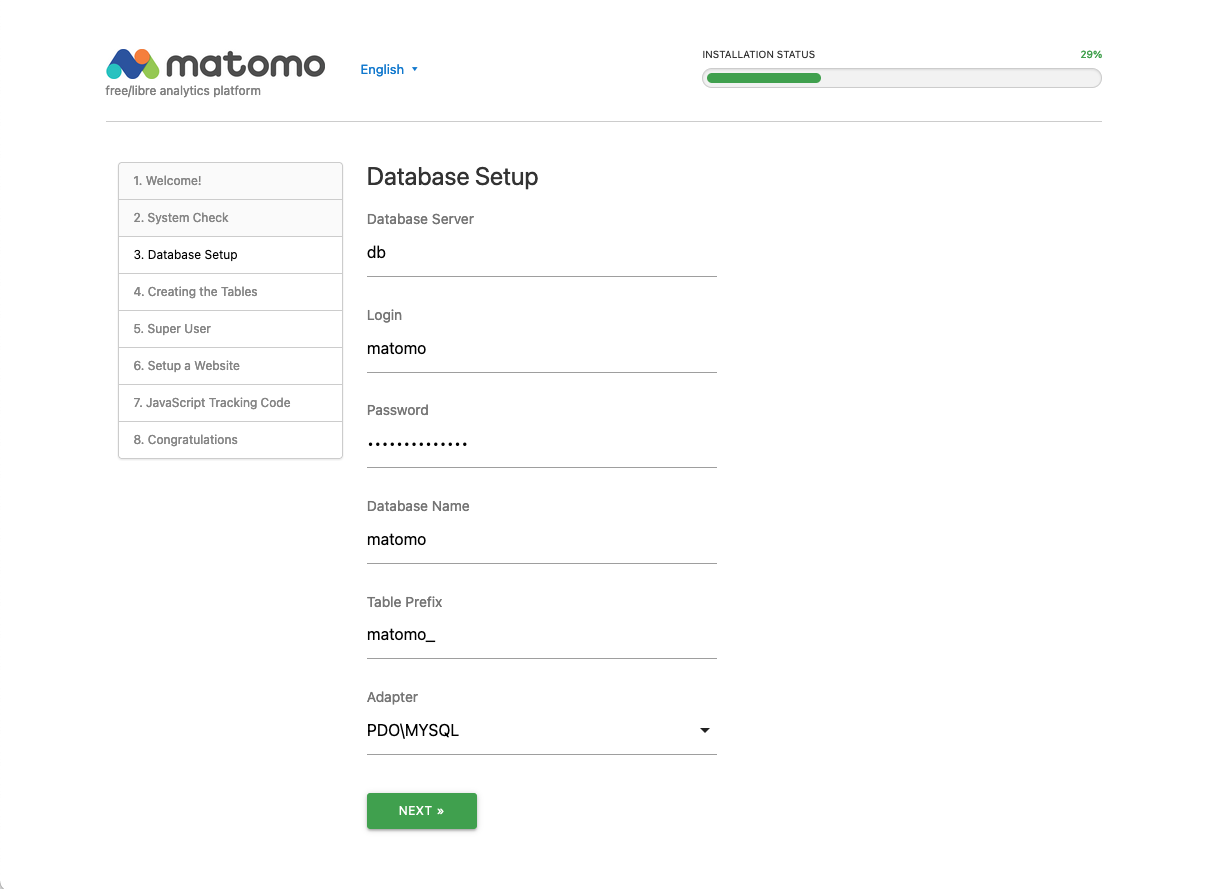
When you get to Step 4, you are presented with the following image:

The image is mostly correct, but in more recent versions of Matomo, you get a drop-down box at the bottom that allows you to select the Database Engine used by Matomo. The drop down defaults to MySQL, but the recipe we are following specifies MariaDB. Make sure you select MariaDB before clicking NEXT >.
One Last Thing!
This is less about the article and more about my personal Matomo deployment…
Once you complete the installation, Matomo will provide you with a snippet of JavaScript that you are supposed to place in the <head> section of any page you want to track. You can do this task manually, but Matomo helpfully provides plugins for popular platforms to make the process simple af.
Unfortunately, when I tried to add this snippet into the header of this blog, styling broke hard. Why? No clue. I’m not a web dev; I’m just a recovering sysadmin! Additionally, in order for tracking to actually happen during my testing, I had to disable my ad blocker (Wipr 2 ftw!). I don’t like to disable stuff unless absolutely necessary.
Thankfully, Matomo provides multiple methods for tracking visitors to your site including the ol’ 1x1 image method. This method isn’t foolproof, but it seems to be working well enough! You can take a look at how I did it by checking out my blog’s footer.html.
Ende

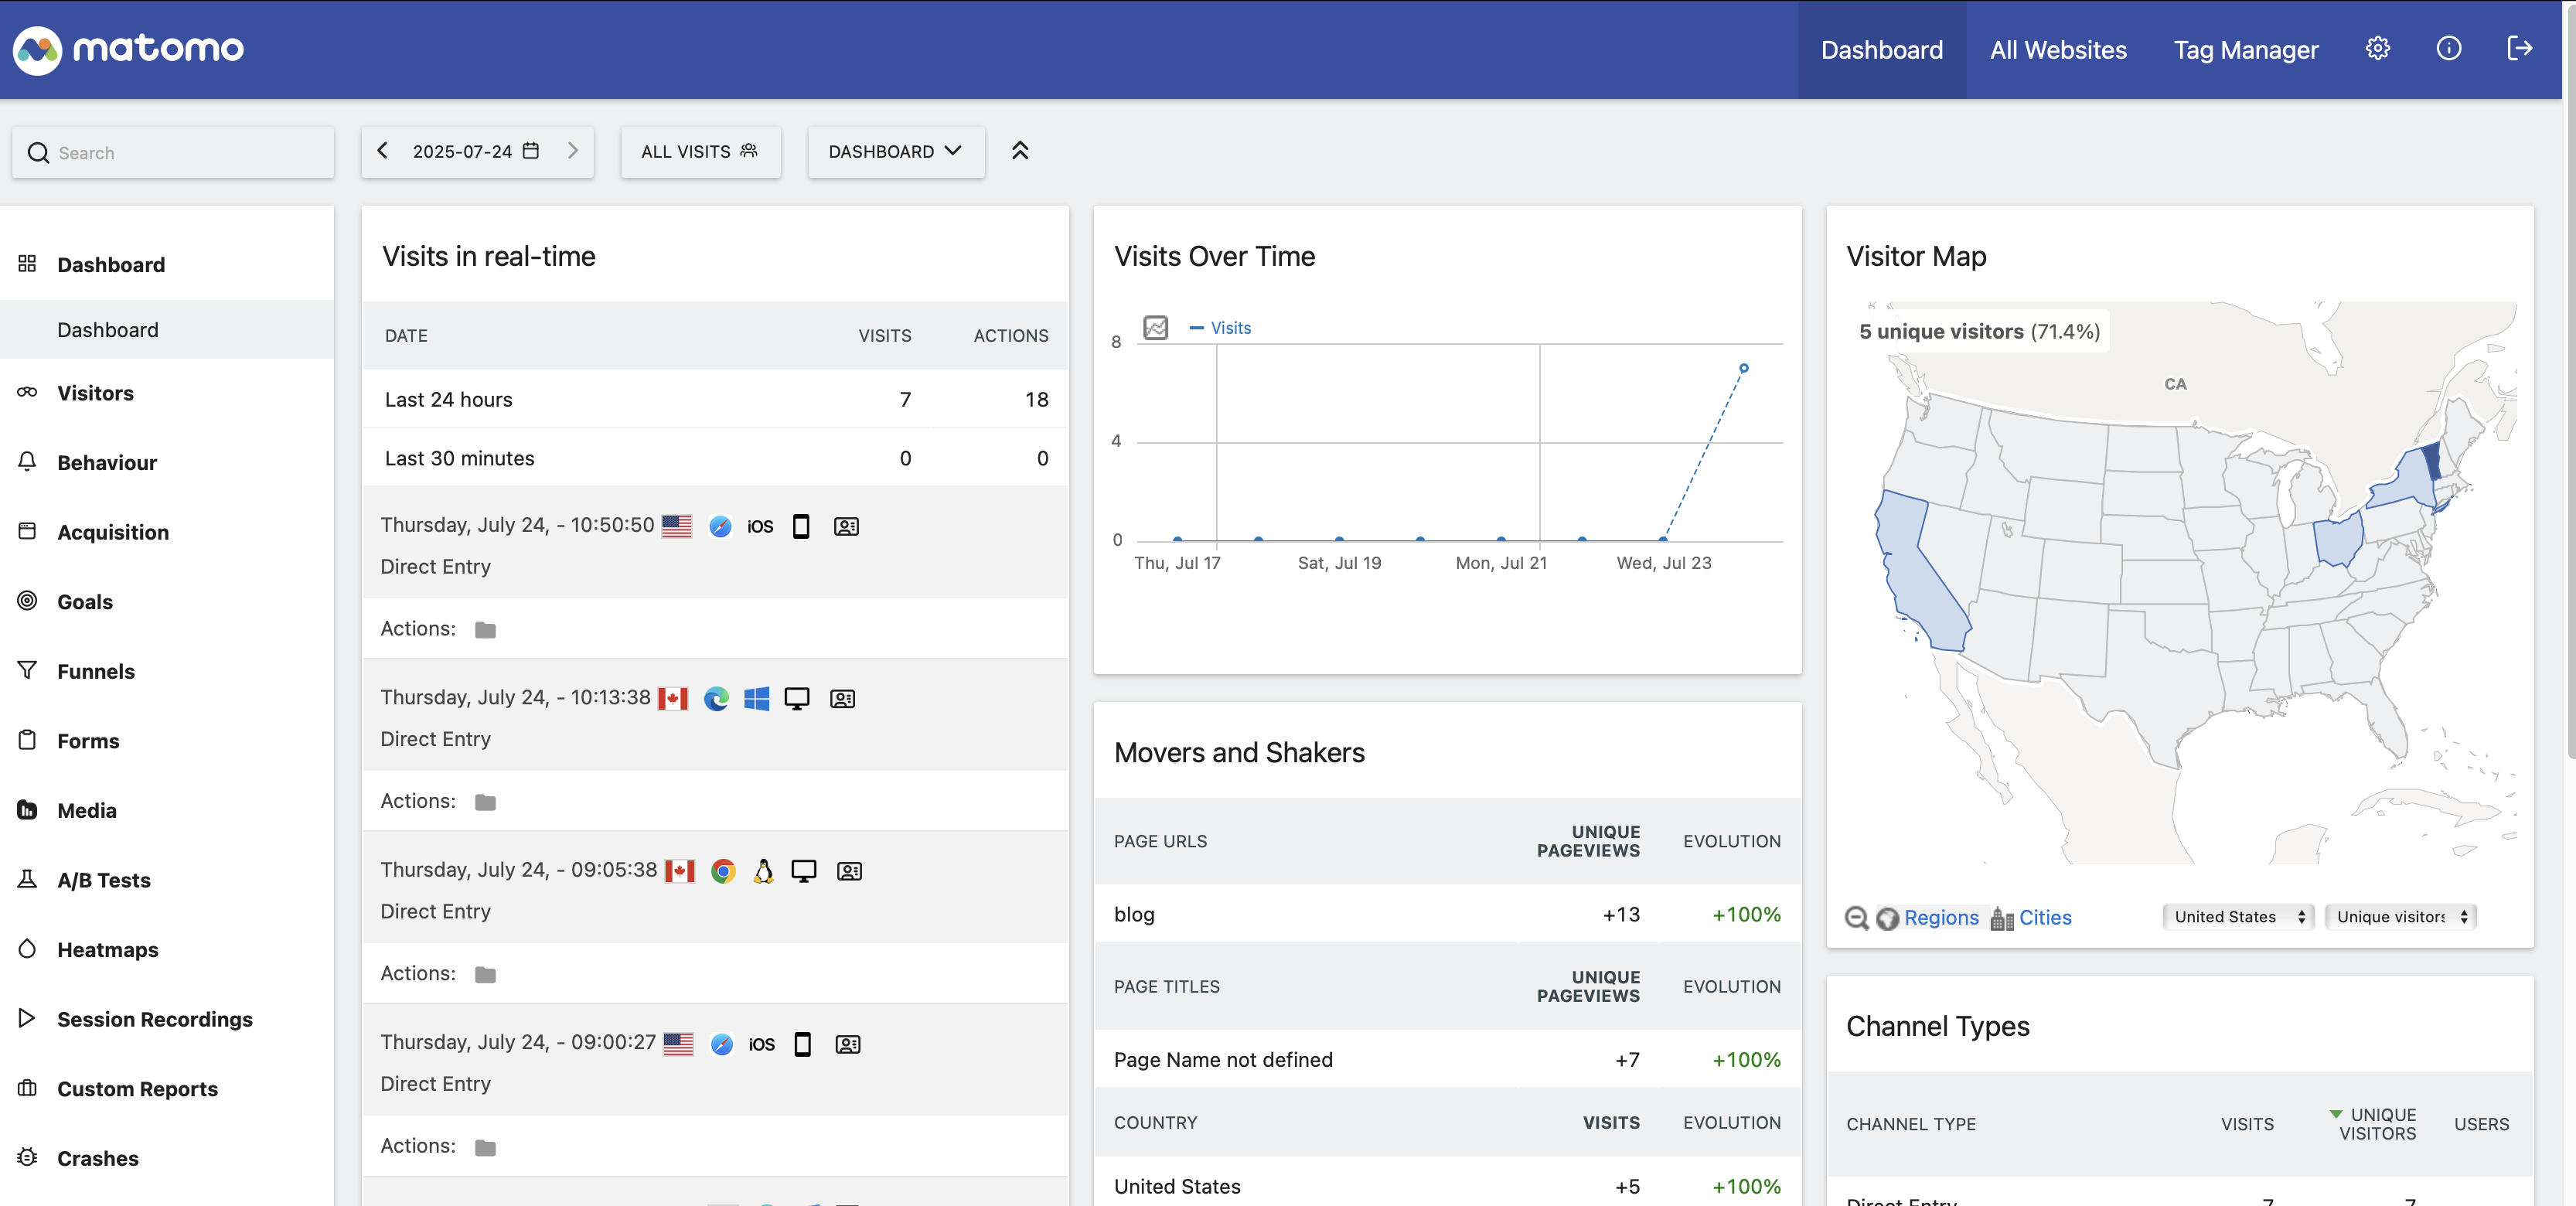
This is an actual screenshot from my deployment. It’s not super snappy, and I’m still learning how to really use it, but at least I can tell how many folks have looked at my blog today. And I did it without having to use yet another Google service!
If you’re interested in setting up analytics for yourself, I hope this article helped you out. As always, if you have any questions or just want to tell me how much I suck, I’m happy to hear from you. Head over to jakehildreth.com to get contact info!